2 posts tagged with "Notifications"

View All Tags

· 4 min read

When managing multi-department forms—such as customer support tickets, sales inquiries, or feedback forms—you often need to route submission alerts to different team members depending on what choices the respondent makes.

For instance, if a user fills out a support ticket and selects Android as their mobile OS, you want the ticket sent to your Android development team. If they select iPhone, it should go directly to the iOS team.

Previously, setting up this behavior required configuring multiple individual notification rules or processors for every single choice.

With Form Notify, you can now set up Advanced Conditional Email Notifications directly within a single processor by assigning specific recipient email addresses directly to each condition set!


What is Advanced Conditional Email Routing?​

Standard conditional logic allows an email notification to trigger only if a specific condition is met, sending to a single fixed recipient list.

With Form Notify's Advanced Routing, each condition set inside your rule can have its own dedicated recipient email address:

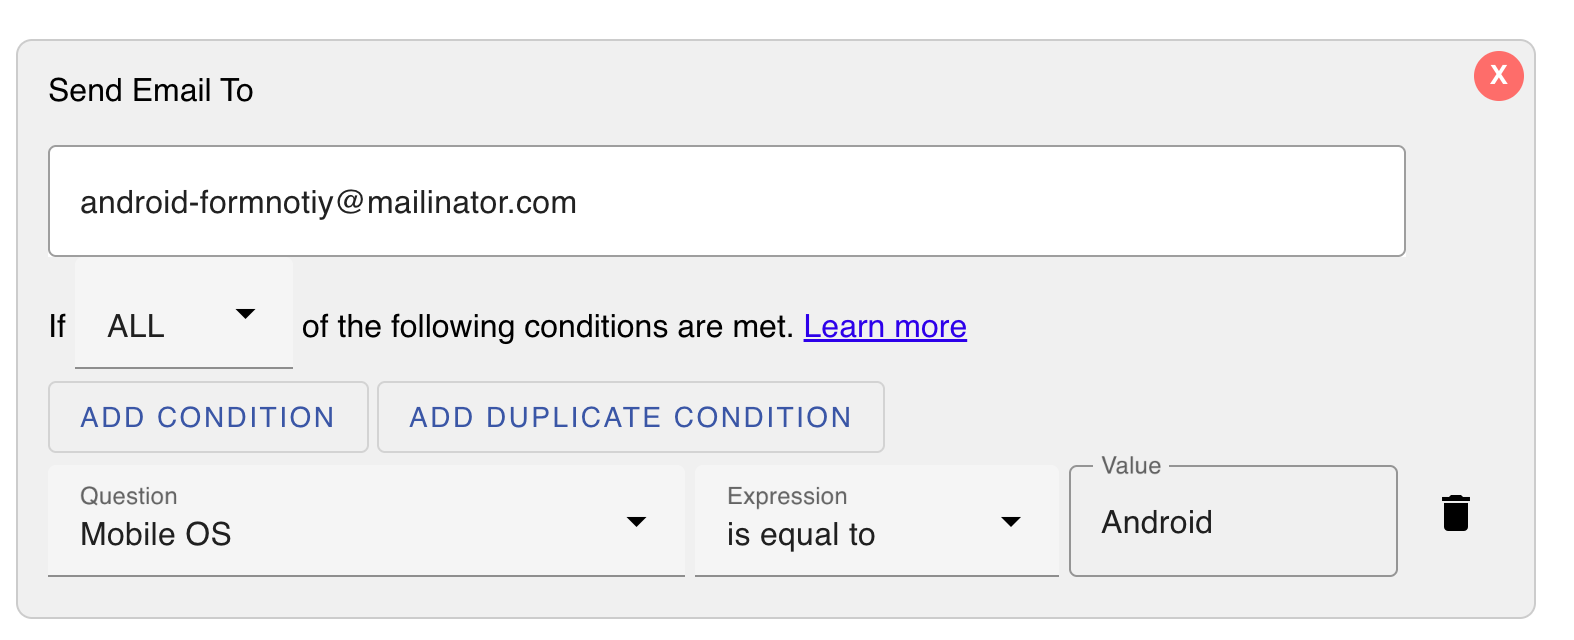
  • Condition Set 1: Mobile OS equals "Android" ➔ Email sent to android-formnotify@mailinator.com
  • Condition Set 2: Mobile OS equals "iPhone" ➔ Email sent to iphone-formnotify@mailinator.com
  • Default Fallback: Mobile OS equals "Other" or no condition matched ➔ Email sent to the default recipient listed in "To Email Address(es)"

Respondent Selects: "Android" ➔ android-formnotify@mailinator.com Respondent Selects: "iPhone" ➔ iphone-formnotify@mailinator.com Respondent Selects: "Other" ➔ default-support@mailinator.com

This single-processor approach drastically simplifies your form notification setup, eliminates duplicate configurations, and keeps your email routing clean and easy to maintain.


How to Set Up Advanced Conditional Routing (Step-by-Step)​

Follow these steps to configure dynamic recipient routing in your Google Form using Form Notify:

Step 1: Launch Form Notify​

  1. Open your Google Form.
  2. Click the Add-ons icon (puzzle piece) in the top menu bar.
  3. Select Form Notify and click Configure / Open.

Step 2: Set Your Default Recipients​

  1. Click Create Processor or edit an existing processor.
  2. In the "To Email Address(es)" field, enter your default fallback email address (e.g., default-support@formnotify.com).
  3. Note: If a form submission does not match any specific condition email, Form Notify will route the email notification to this default recipient.

Default Email Recipient Settings


Step 3: Configure Recipient Emails per Condition Set​

  1. Scroll down to the Conditions section and enable conditional logic for the processor.
  2. Add your first condition rule for Android and enter its specific email recipient (android-formnotify@mailinator.com):

Android Recipient Condition Configuration

  1. Add your second condition rule for iPhone and set the recipient to iphone-formnotify@mailinator.com:
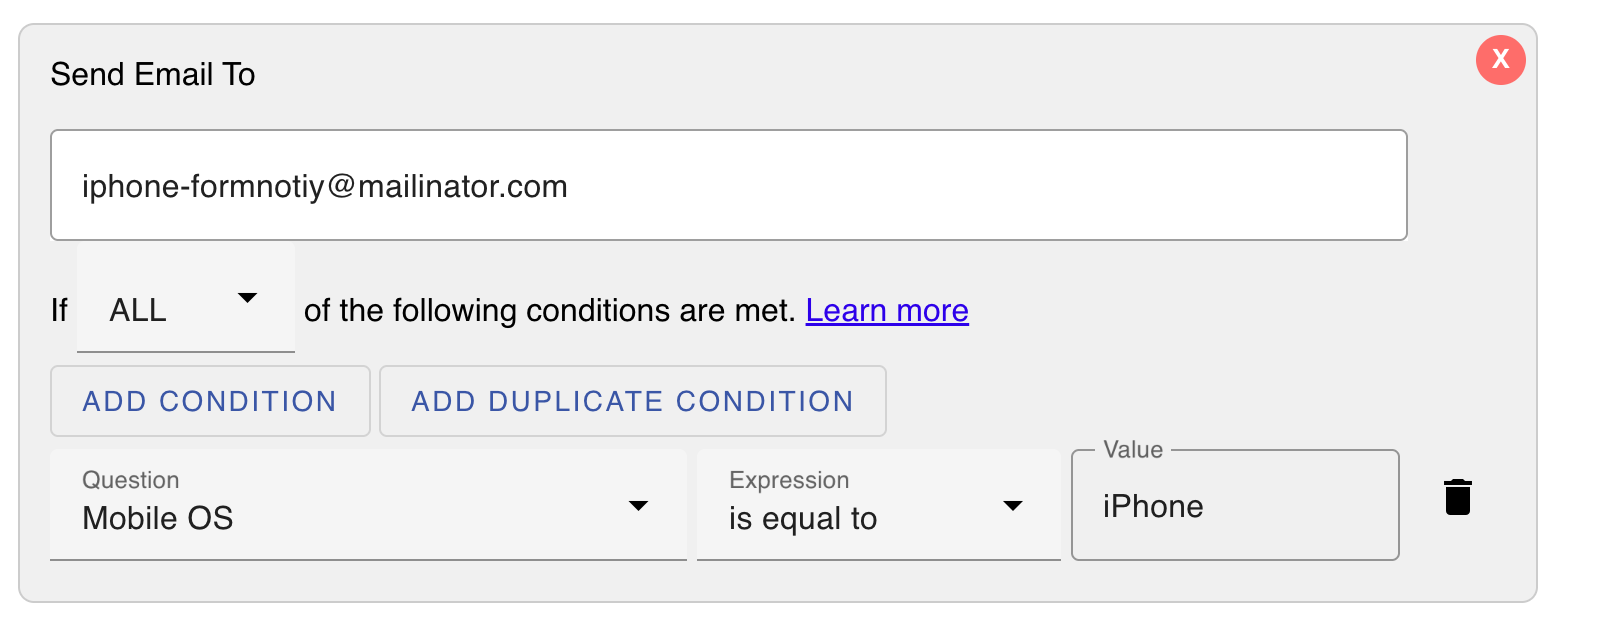
iPhone Recipient Condition Configuration

  1. Configure the condition set for Other / Default fallback routing:
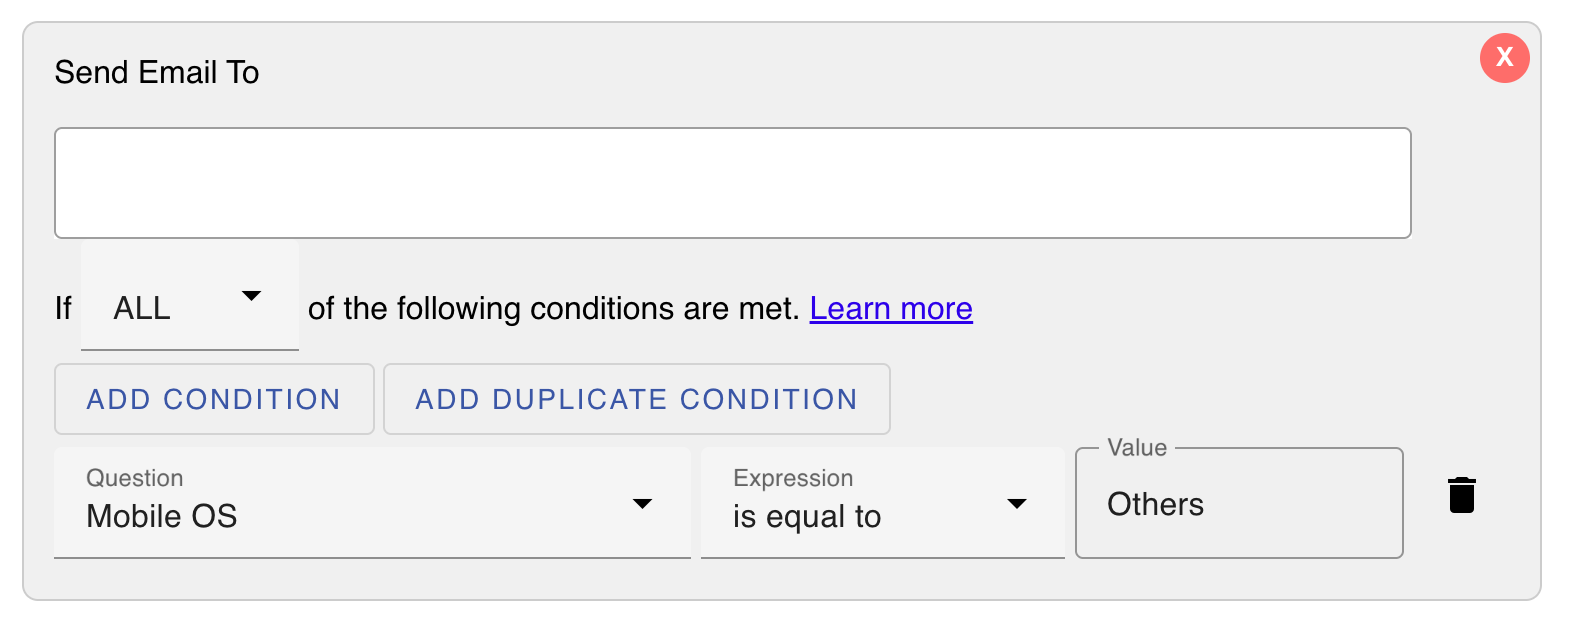
Default Recipient Condition Configuration


Step 4: Save and Test Your Form​

  1. Click Save Rule.
  2. Submit a test response choosing "Android" to verify the email reaches android-formnotify@mailinator.com.
  3. Submit a test response choosing "iPhone" to verify delivery to iphone-formnotify@mailinator.com.
  4. Submit an option like "Other" to confirm the alert routes to your default recipient list.

Why Use Single-Processor Routing?​

  • Fewer Rules to Maintain: Manage all recipient routing for a single form in one clean workflow rather than maintaining 5 to 10 separate processors.
  • Optional Email Overrides: The condition email field is completely optional. If left blank, the system automatically falls back to the main processor's "To Email Address(es)".
  • Error Reduction: Avoid missed notifications caused by conflicting rules or duplicate email triggers.
  • Flexible Logic: Combine multiple questions and conditions (AND/OR logic) while keeping recipient management centralized.

Frequently Asked Questions​

What happens if a condition set does not have an email address specified?​

If a condition set matches but has no specific recipient email configured, Form Notify defaults to the main email address(es) defined in the "To Email Address(es)" field of the processor.

Can I send notifications to both a condition-specific email and a global supervisor?​

Yes! You can add your supervisor's email address to the main "To Email Address(es)" field or use dynamic tag routing to loop in team managers alongside department-specific email addresses.

Does this work with multi-select form fields?​

Yes. You can route emails dynamically based on single-choice, multiple-choice, dropdown, or text input response values in Google Forms.


Upgrade Your Google Forms Workflow Today​

Streamline how your team handles incoming form submissions without complex Google Apps Script coding.

· 4 min read

By default, to view submissions, you have to manually open your form and navigate to the Responses tab. Google Form Editor -> Responses Tab -> View Individual Answers

If you prefer to be automatically alerted whenever someone fills out your form, you can enable built-in email notifications or use a dedicated Google Workspace add-on like Form Notify.


How to Enable Native Google Forms Email Notifications​

Google Forms includes a default setting that sends an email alert to the form owner upon every new submission. Here is how to turn it on:

  1. Open your form in Google Forms.
  2. Go to the Responses tab at the top.
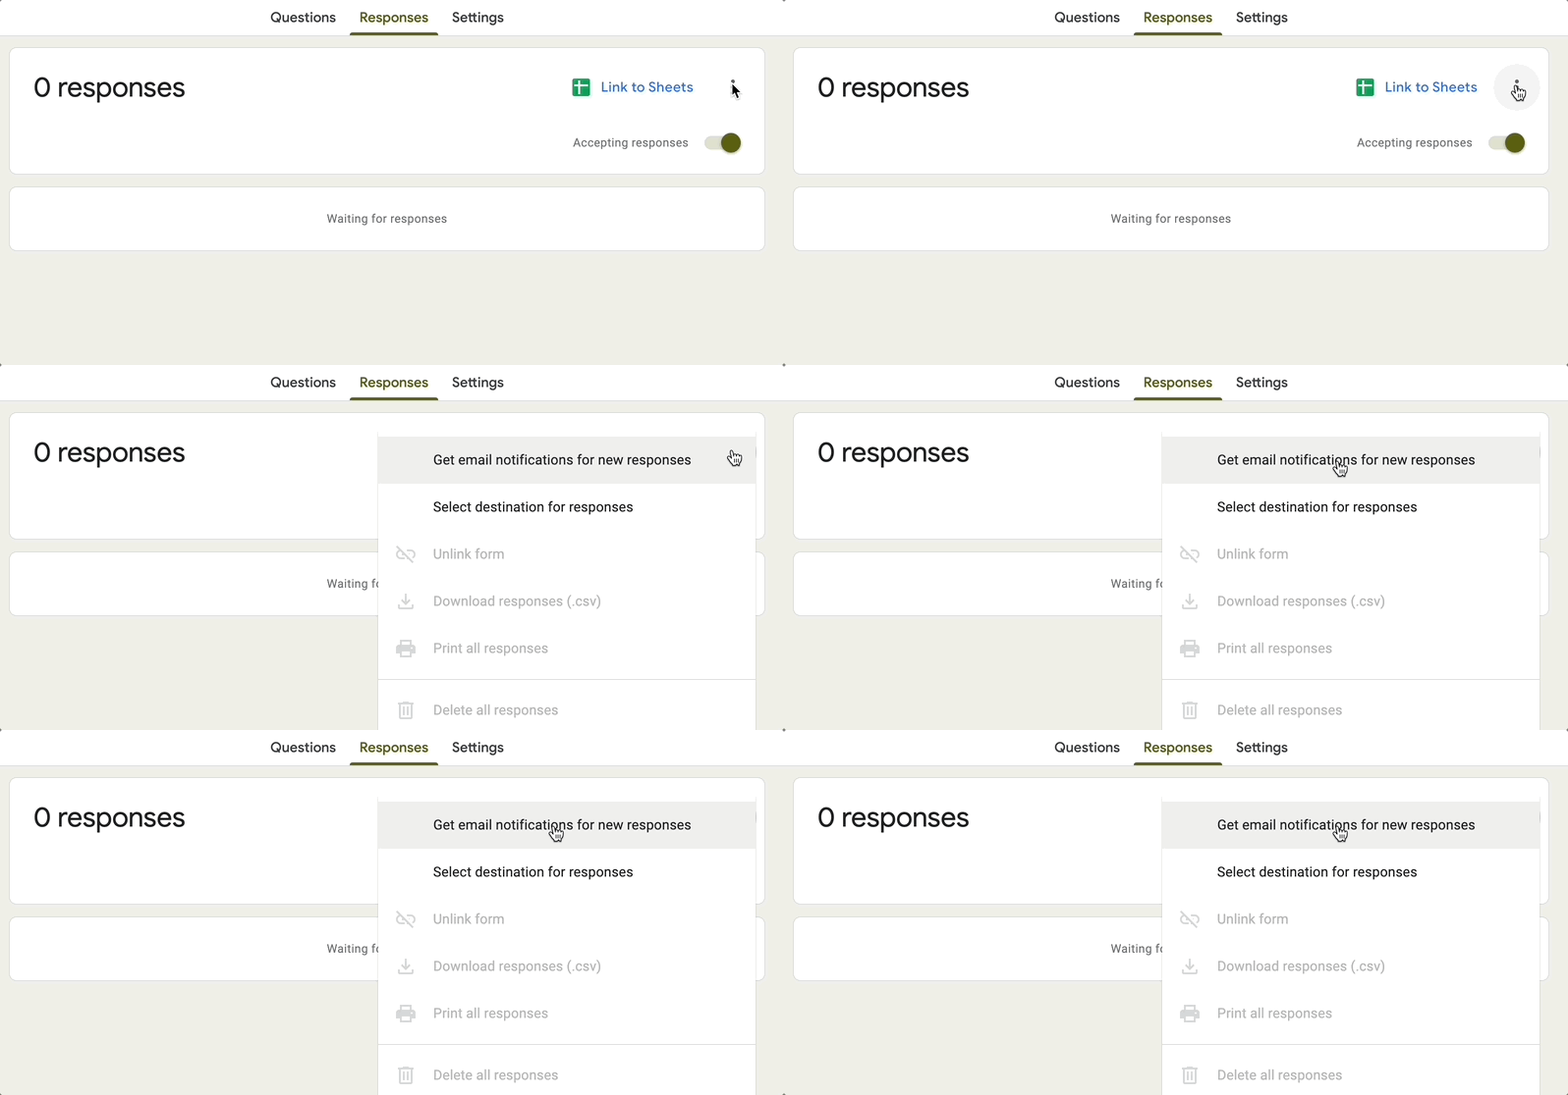
  3. Click on the three dots icon (⋮) in the top-right corner of the Responses panel.
  4. Select "Get email notifications for new responses".

Enable Email Notifications

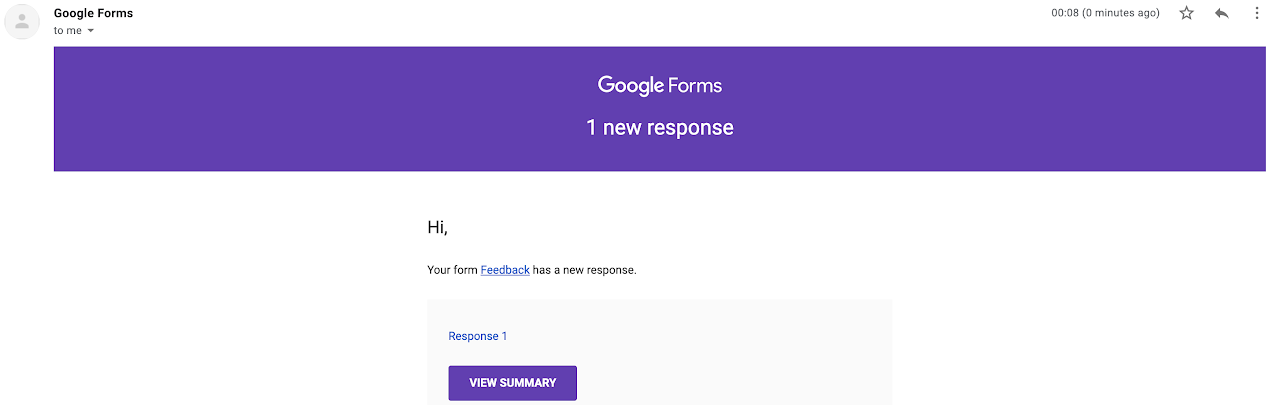
Once enabled, you will receive an automated email notification in Gmail every time someone submits your Google Form.

Form Email Notifications in Gmail


Limitations of Built-In Google Forms Notifications​

While the native Google Forms email notification feature is quick to turn on, it comes with several major drawbacks:

  • No response content in the email: The notification only alerts you that a submission occurred; it does not include the actual form responses or field values inside the message.
  • Extra clicks required: You must click a link inside the email and navigate back to Google Forms or Google Sheets to inspect the submission.
  • Single recipient limit: Notifications are sent strictly to the form owner's email address. To notify team members, you must add them as collaborators, and each person must manually log in and enable notifications themselves.
  • No respondent confirmation emails: You cannot automatically send a thank-you or confirmation email back to the person who submitted the form.
  • No conditional routing: You cannot send notifications to different departments or team members based on specific answer choices (e.g., routing support requests vs. sales inquiries).

How to Send Personalized Email Notifications for Google Forms (To Owners, Team Members & Respondents)​

You can overcome all of these limitations by using the Form Notify - Email Notifications for Google Forms add-on.

With Form Notify, you can:

  • Include full response data directly inside the email body using dynamic tags.
  • Send immediate notification emails to multiple team members or dynamic email addresses.
  • Automatically send confirmation emails to the form respondent.
  • Apply conditional logic to trigger notification emails only when specific criteria are met.

Step 1: Install and Launch the Add-On​

  1. Install Form Notify directly from the Google Workspace Marketplace.
  2. Open your Google Form.
  3. Click the Add-ons icon (puzzle piece) at the top of the screen.
  4. Select Form Notify and choose Configure / Open.

Step 2: Configure Your Email Notification Rule​

  1. Inside the Form Notify panel, click Create Processor.
  2. Set Recipients: Enter the email addresses of the team members or stakeholders who should receive the alert. To notify the form respondent, select the form field that captures their email address.
  3. Customize Email Template: Draft your subject line and message body. Use dynamic field markers (such as {{All Answers}} or specific form question variables) to display exact response content directly in the email.
  4. Set Up Conditional Logic (Optional): Define rules so emails are routed to specific addresses depending on user selections (e.g., send to sales@example.com if "Department" equals "Sales").
  5. Save & Enable: Save your rule. Your Google Form is now set up to trigger custom email notifications on every form submit!

Frequently Asked Questions​

Why am I not getting Google Forms email notifications?​

Check your Gmail Spam or Promotions folder. Ensure that the "Get email notifications for new responses" setting is checked in the Responses tab, and verify that you are logged into the Google account that owns the form.

Can Google Forms send an email notification to the respondent?​

The native Google Forms feature cannot automatically send response receipts or customized thank-you emails to respondents. However, you can easily set this up using the Form Notify add-on by selecting the respondent's email field as a recipient.

How do I send Google Form submit notifications to multiple email addresses?​

Native notifications only alert the form owner. To alert multiple colleagues or a group email inbox automatically, install Form Notify, enter your list of target email addresses in the notification rules, and save.


Get Started with Advanced Form Notifications​

Ready to streamline your workflow and get full response details delivered directly to your inbox?