How to Create PDF files from Google Sheet Rows
With Docu Merge you can instantly create a document using another google document as template. The add-on empowers you to generate document and share them with multiple recipients using google's document sharing options.
After you install and launch the add-on, it's time to generate your first document.
Read on to understand more on how this works.
Goal of the exercise
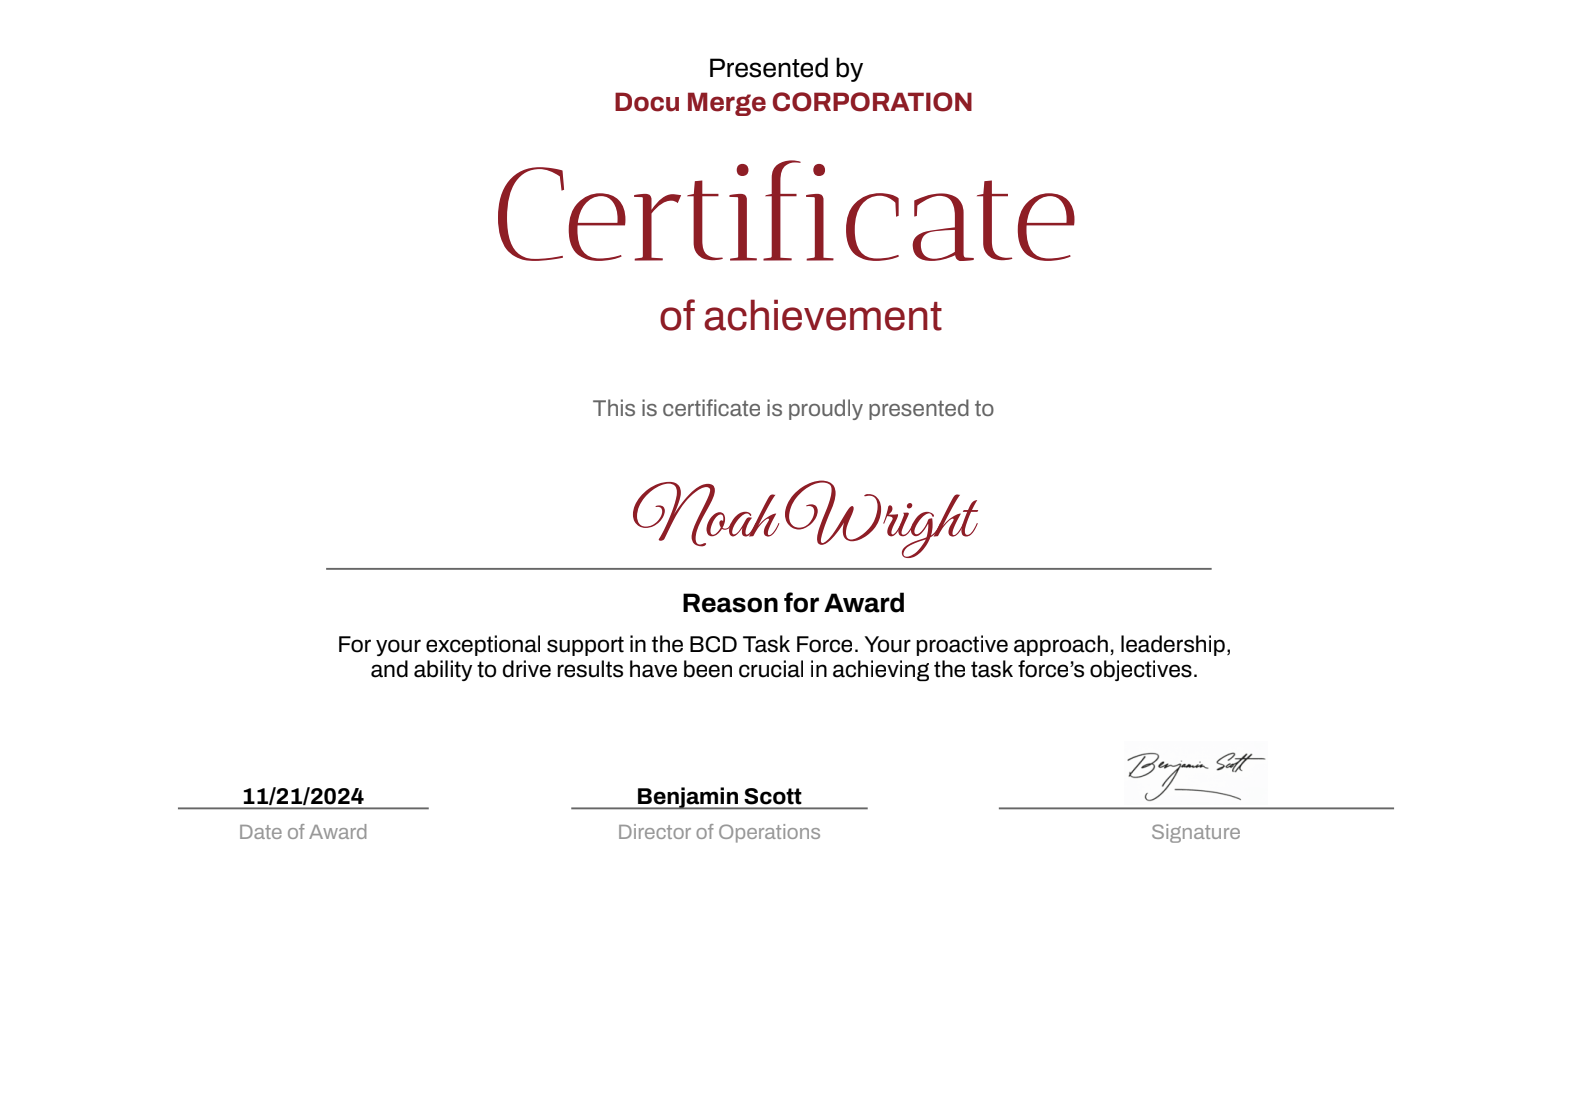
By the end of this you will be able to create a PDF certificate that will look like the below
 .
.
Data Preparation
- Open the Google sheet.
- Copy the above Google sheet to your account by File -> Make a copy.
- Create a folder in your Google drive account "DOCU_MERGE_OUT_PUT"
As you can see the above Google sheet has all the data required to generate a certificate we need.
- Open the Google Doc Certificate Template
- Copy the above file to your Account by File -> Make a copy.
The final Certificate generated will look like the one found in the above Google document.As can be observed the document has been parameterized with expressions such as
{{Recipient Name }} , {{Award Reason}} {{Date of Award}} {{Presenter Name}} {{Embed Image,Presenter Signature,100,45}} .
As can be noted the content inside the curly braces {{}} is nothing bu the column/first cell names in our Google Sheet shared above.
Each row from the google sheet will be used to create a certificate.
Generate Certificate
Open the Add on menu
- Open the Google sheet created under your account .Open the Docu Merge by going to Extensions -> Docu Merge -> Open
Create a New work flow
- Create a workflow by clicking "Create Workflow"
Workflow Name
- Under the basic Tab provide a name to the work flow . Let's go with "Bulk Certificate Generation"
- Click on "Continue" Button.
Workflow Activities
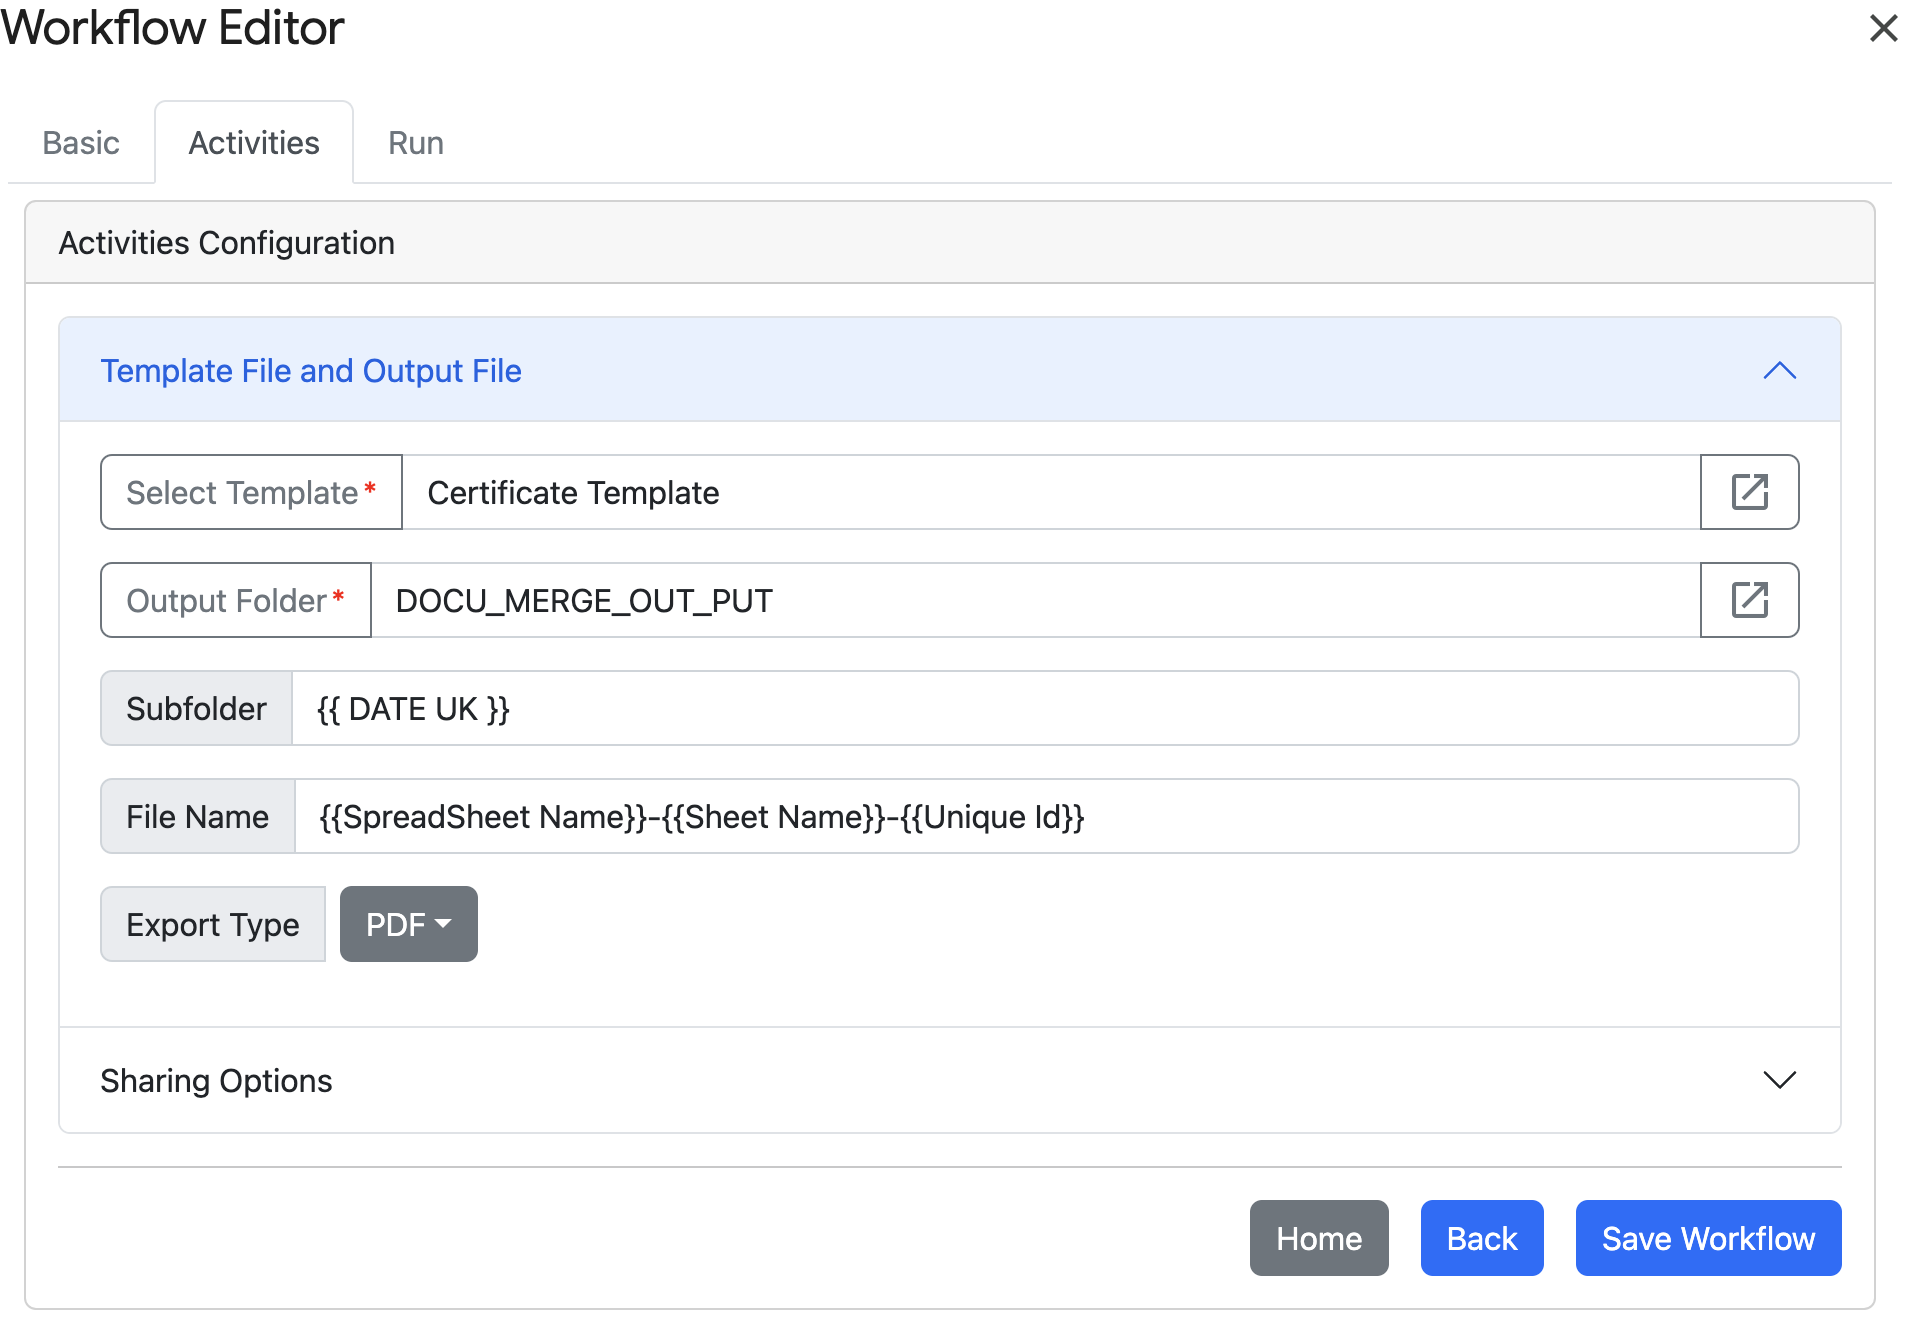
- Click on Select Template and Select the Google Doc file "Certificate Template" copied in the above steps.
- Click on "Output Folder" and select the folder "DOCU_MERGE_OUT_PUT" created above .All the certificates will be generated in this folder.
- Provide
{{DATE UK}}under Subfolder .The program will create a separate folder with current date in UK format when the Add-on runs. - provide
{{SpreadSheet Name}}-{{Sheet Name}}-{{Unique Id}}under "File Name" .The files generated will be named using the expressions supplied in the file name format. - Leave the default Export type as "PDF"

Save Work flow
- Save the workflow by clicking "Save Workflow"
Open Run Workflow Window
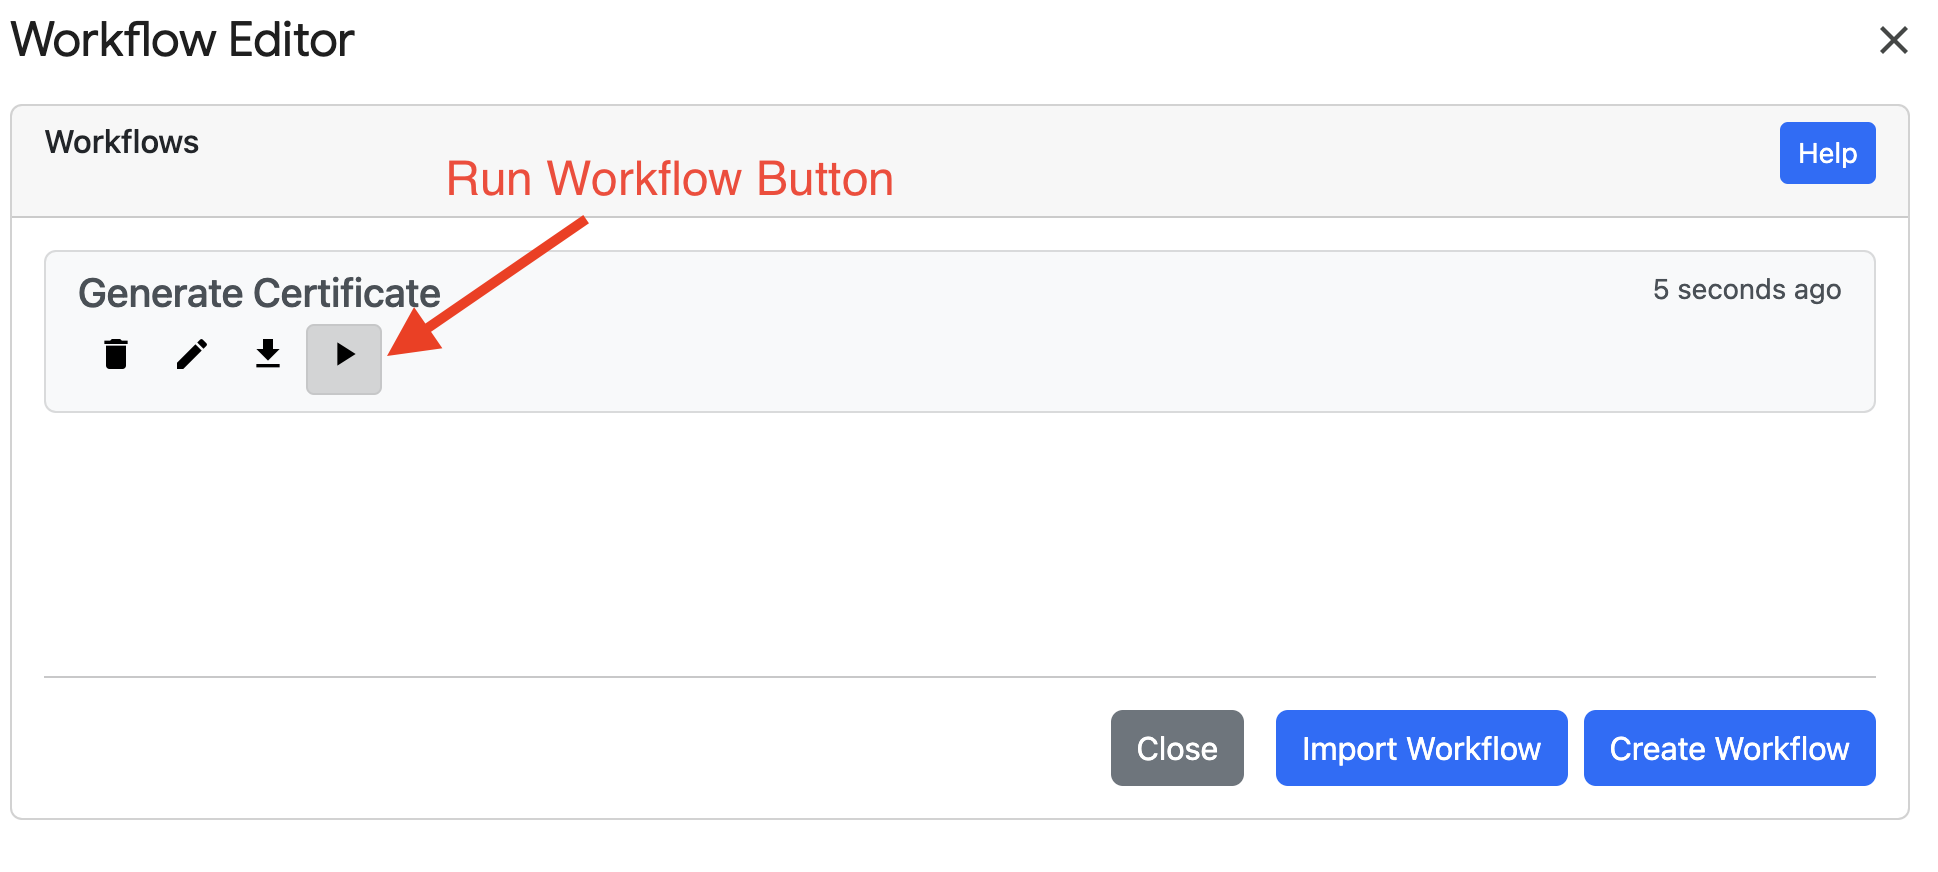
- From the homw page click on the "Run" button of the workflow as shown below .
This will bring up the Run Workflow window.

Fetch Run Config
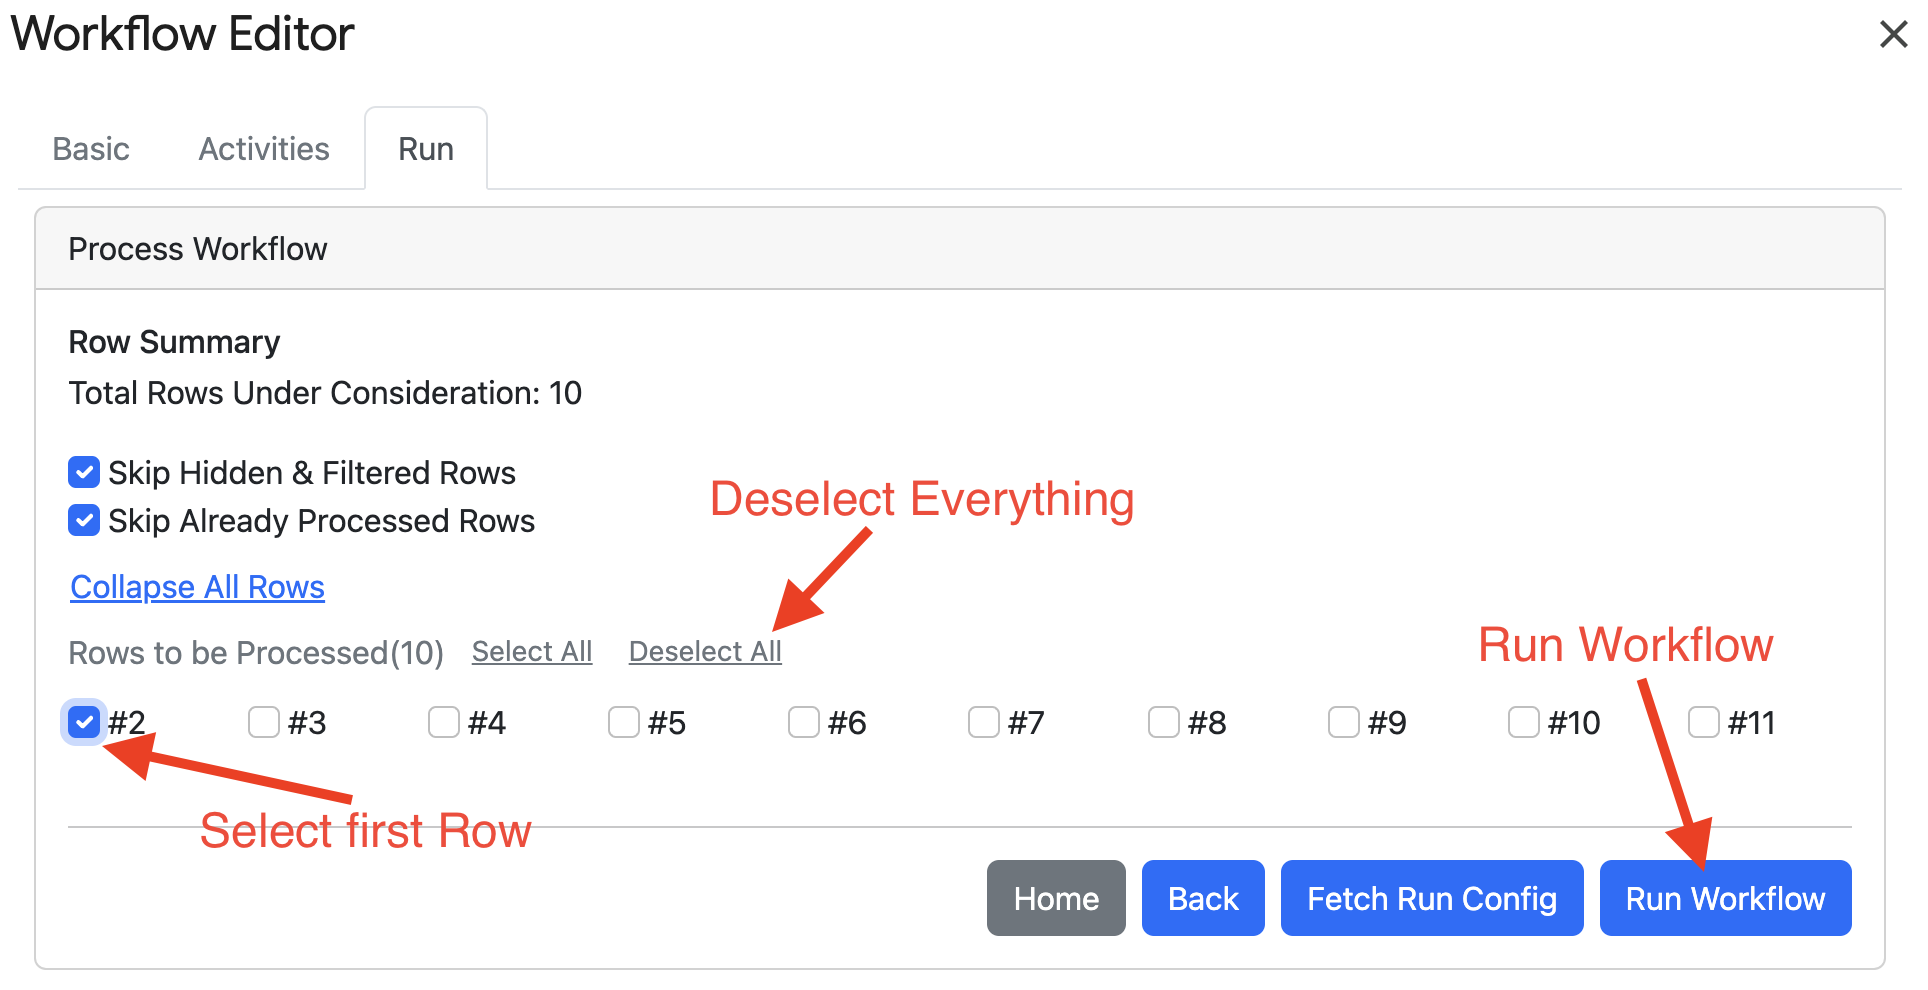
- On the Run workflow window click on "Fetch Run Config". This will connect to your Google sheet and present you with various options along with the option to select each row.
Run the work flow

- One you have the result of "Fetch Run Config" , Click on Expand All Rows.
- Deselect all Rows. -Select only Row #2 .We will generate the certificate for only one row during our test.
- Click "Run workflow"
If everything goes well , you should see your certificate generated in the subfolder provided inside the out put folder "DOCU_MERGE_OUT_PUT" . The sub folder will be named as per the current date.The window will also present you the summary of the work flow run .If "Processed Row" is not 0 it indicates the row was processed successfully.
Tracking Generated Documents
In the Google sheet against each row you will see new cells/columns created and it will have link to the generated file.
Concepts
What are workflows anyway?
Workflows are a set of activities that need to be executed in a predefined sequence to complete a process. For example, generating a pixel-perfect invoice or PDF, sending an email, or transferring data to another system when someone submits a form.
Activities in Workflows
Currently, only one activity (Export Activity) can be created per workflow. This activity helps generate pixel-perfect PDFs, including invoices, newsletters, or any professional PDFs.